How to open, label, and thematize a .shp file with Microstation V8i
In this article we will see how to open, theming and label a shp file using Microstation V8i, the same works with Bentley Map. Although they are archaic 16-bit files, old like some -many- of my gray hair, it is inevitable that they continue to be used in our geospatial context. It is clear that these criteria are applicable to vector objects linked to other data sources.
Someday I talked about how, using Microstation V8, Import, label And also how to do Themed.  For that time I used Microstation Geographics version 2004, which I surprisingly see that many still use it with great satisfaction -Or fear of migrating-. In this case we are going to use Microstation PowerView version Select Series 3, this is more or less equivalent to what PowerMap was, with a price of around $ 1,500 for a perpetual license.
Open a shp file
With these versions it is not necessary to import the shp file, because it reads it directly, either as a file in master mode or called reference.
For this it is done:
File> open
Then in the file type, we select those of type .shp, so that only the files of that type are listed. As you can see in the graphic, Microstation V8i can open without importing, files of type dgn, dwg, dxf, block files (.cel), libraries (.dgnib), also True dwg versions of AutoDesk (dwg and dxf), sketchUp (.skp), among others, including dgn that can have any extension at will (.cat .hid .rie .adm, etc.)
View dbf data
 The shp file has the spatial objects, it occupies at least two additional files: a shx that is the indexed one and the dbf that contains the database linked to the spatial objects. Additionally, the .prj containing the projection and reference system is also important.
To view the properties of the dbf file, do the following:
Tools> geospatial> database operations
From this panel, we select icon 5 called “Review XFM attributes”.
Recall that xfm attributes exist from Microstation Geographics 2004, when they applied the xml association of tabular data to vector objects as an evolution of the traditional engeneering link.
 By then it was only applicable to attributes created from the Geospatial Administrator. It is now possible to read any information from database associated with an object.
The creation of the Model
To create labels, theming, or other spatial functions, it is first necessary to generate a model. This cannot be done from the workspace and it looks like -Although it is not the same- to AutoCAD layout.
This is done as follows:
File> Map manager
We are going to ask if we want the model to be created, we choose the option yes, and we add reference.
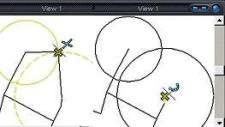
With this, a side panel is created to the left of the workspace, where you can see the data both in the form of feature classes and levels. This model supports its own reference files, view properties and many other spatial analysis functionalities such as buffer generation, geoprocesses (join, intersect, exclude ...), data listing, locate and of course, which is explained below: themed and labeled.
Theoretical by criteria
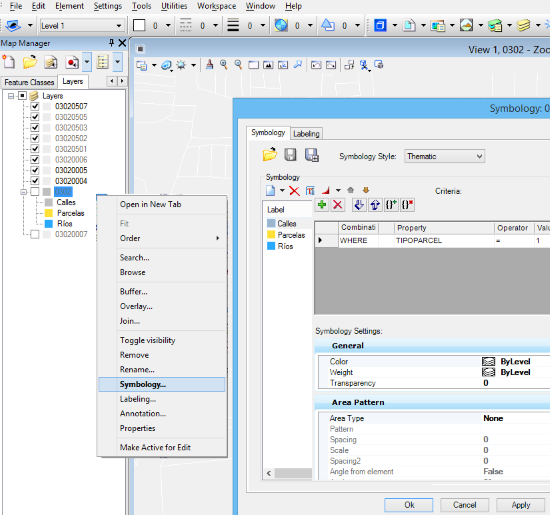
To theme, select the layer with the right mouse button and choose “Symbology…”. In this case, I am using a full sweep cadastral map, which means that public assets such as riverbeds and streets have a cadastral key and are represented as parcels.
Let's suppose that in my cadastral map, I want to paint street-type parcels gray, property-type parcels in orange, and river-type parcels in blue. For this, I must create three classes:
The “Thematic” symbolization option is selected, then the first class is created, with the name Calles, with a condition chosen in the table WHERE TIPOPARCEL = 1, as shown in the following graph. The class can be defined color, line type, thickness, transparency; in this case we select gray color. In the same way we do with the River type plots in blue and Property type in yellow.
Once the “Apply” button is selected, this is the result. I recommend that you play around with the other features, such as creating classes based on ranges or others that we are used to seeing in GIS programs.

Placing labels from the dbf
Finally, if what we want is for the parcels to have a label. The layer is selected with the right mouse button, and "Labeling..." is chosen, with this a panel appears where we will select "By Layer" as the labeling style, Arial text, red, from the base column named PLOTID and that the text is not rotated according to the shape of the plot (Orientation Fixed).
There we have it, a dynamic text from the dbf. Of course, it is possible to add automatic fields as an object area, which unlike a stored area, is dynamic and updates with editing the geometry.

Labeling and theming style properties can be saved as xml, with a .theme extension, similar to SLD styles. So they are called again and applied to other layers or within a routine programmed in VBA.
So far the file we have worked with is a shp and it is read-only. But with saving it as dgn, it can be edited and all the properties of the database will be in the xml embedded in schemas contained in the dgn.